Your event’s own store app
Some events want their own app in the stores. Attendees search for the event's name, install an icon in your colours, and open straight into your event. On this page you name the app, add its images and store listing, connect your store accounts, and publish it.
How it works
Your own app, built from the attendee app
Your store app is the same attendee app everyone else uses, so it gets every feature and improvement. It opens straight into your event, under your name and icon.
The stores require an app built from a template to be published by the business whose content it is. That is why the app goes out under your own Apple and Google accounts.
App → Mobile app appears in the event's menu once Moostoo has turned a store app on for the event. Moostoo also decides whether the event is listed in the main Moostoo app too (Both) or only in yours (White-label only). The header shows this choice as Set by Moostoo.
Before you start: store accounts
You need a developer account with each store before the first build. Create both for your company, not as a personal account. Each store verifies the company, so start a few weeks before the event.
| What | Apple Developer Program | Google Play developer account |
|---|---|---|
| Account type | Company / Organization | An organization or business |
| Cost | US$99 a year (or local equivalent) | US$25 once |
| You need | A D-U-N-S number, the company's legal name as registered with D&B, a website on your own domain, an Apple Account with two-factor authentication, and the legal authority to sign for the company | The same D-U-N-S number, a company Google Account with 2-Step Verification, a payments profile in the company's legal name, and a contact phone and email |
| How long | A few days with a D-U-N-S number; allow up to two weeks without one | A few days once Google has verified the organization and the contact |
| Then | Copy the Team ID into Store accounts, accept the Paid/Free Apps agreement, and create an App Store Connect API key | Invite Moostoo's publishing account (shown under Store accounts) with Release permissions |
- A D-U-N-S number is a free business identifier from Dun & Bradstreet. Look yours up with Apple's D-U-N-S lookup, or request one there. A new number can take up to five business days. The same number serves both stores.
- Choose an organization account on Google Play. New personal accounts must run a closed test with at least 12 testers for 14 days before they can publish.
- Use role addresses you will keep, such as apps@yourcompany.com, rather than a person's own address.
- The Manual store steps section guides you through each account, with links. Open a step's Show instructions.
The parts of the page
- Readiness — one line per store at the top: Ready to build, or how many items are missing. show lists them and takes you to each field. Publishing stays disabled until a store is ready.
- App identity — the name under the icon (up to 30 characters), the iOS bundle ID, the Android package name and two colours.
- Assets — the icon, splash screen, screenshots and the Play feature graphic.
- Store listing — the texts and links on the store page.
- App Review information — who the stores contact, and a reviewer account.
- Store accounts — your Apple keys, and the Android upload key.
- Manual store steps — what the stores give no way to do automatically.
- Publishing and Store status — building, submitting, and where the app stands in each store.
App identity and assets
The bundle ID and package name are locked after the first upload. The stores never let them change, and the page says so.
Every image is a PNG at a size the stores accept. A wrong size is refused as soon as you choose it, with the size it must be:
- Icon: 1024×1024, no transparency.
- Splash screen: 2732×2732.
- iPhone screenshots: 1320×2868, 1 to 10.
- iPad screenshots: 2064×2752, 1 to 10.
- Android screenshots: 1080×1920, 2 to 8.
- Play feature graphic: 1024×500.
Store listing and review
The store listing holds the description, App Store subtitle, keywords and promotional text, the Play short description, What's new, and your support, marketing and privacy policy links. The privacy policy is yours, because you publish the app.
Under App Review information, add a reviewer account. It is an attendee registered for this event, with its password, so reviewers can see the app working.
Store accounts
For Apple, you enter your Team ID, an App Store Connect API key and an APNs key.
Google Play needs no key from you. The page shows Moostoo's publishing account, which you invite in your Play Console with Release permissions.
Moostoo makes the Android upload key on a new app's first build. If your app is already on Google Play, choose Use an existing key. Upload the keystore you sign it with (a .p12), its password and alias. The page then shows the key's fingerprint and a Download certificate button.
Keys can be saved but never read back. Once saved, the page shows Saved and the date, with Replace and Remove.
Manual store steps
Some steps have to be done in Apple's and Google's own sites. Steps a store can confirm tick themselves after a status check. You tick the others.
Publishing
Each store has three actions:
- Build & upload — a new version to TestFlight or to Internal testing.
- Submit for review (iOS) or Release to production (Android). Submitting while a version is waiting for review takes that version out of review first.
- Publish listing changes — updates the store page without a new version.
Each action asks you to confirm first. It then appears in Publishing history with its platform, action, version, progress and log.
A stuck or unwanted job can be stopped with Cancel. You can start a new Build & upload at once. Anything already uploaded to the store stays there.
Store status
Each store's card shows where the app stands, for example Waiting for review or In production, and its version. Store status shows what App Store Connect and the Play Console report: the newest build, the review state, and each Play track and its rollout. Click Refresh to read it again.
Google Play doesn't report reviews this way. For a week after Release to production, Android reads Sent to Google for review. The review result itself is in the Play Console.
Who can do what
Editing the app needs the Edit event settings permission. Store accounts and publishing are for the Account Owner and Super Users. Everyone else sees the page read-only.
Step by step
Get your store accounts
Create your Apple and Google developer accounts. See Before you start above, and the first step of each store under Manual store steps.
Describe the app
Open App → Mobile app.
Fill in App identity.
Check the bundle ID and package name carefully. They cannot change after the first upload.
Choose the Assets.
Fill in the Store listing and App Review information, saving each section.
Connect your store accounts
Under Store accounts, enter your Apple Team ID.
Enter the App Store Connect Issuer ID and Key ID, and upload the .p8 key.
Upload the APNs key.
Copy the address of Moostoo's publishing account for Google Play.
If the app is already on Google Play, upload its upload key under Android upload key → Use an existing key.
Do the manual store steps
Create the app in App Store Connect and in the Play Console.
Answer App Privacy and Data safety with Moostoo's answers.
The page shows them, with a Data safety CSV file you can import.
In the Play Console, invite Moostoo's publishing account under Users and permissions, with Release permissions.
Build and release
When the readiness line says Ready to build, click Build & upload for each store and confirm.
The job appears in Publishing history and the page updates while it runs.
For Android, download the .aab from that job. Upload it once by hand to Internal testing in the Play Console.
Google accepts automatic uploads only after an app's first release.
Test the build in TestFlight and in Internal testing.
Click Submit for review for iOS, and choose whether to release automatically once approved.
Click Release to production for Android, and choose the rollout percentage.
Follow Store status. Click Refresh to read it again.
Change the store page later
Edit the Store listing or the screenshots, and save.
Click Publish listing changes for each store. No new version is built.
What attendees see
In the attendee app
Attendees install your app from the stores under your name and icon. It opens straight into your event, or its sign-in screen when they are signed out. There is no list of other events. Inside, it is the same attendee app they would use on the web.
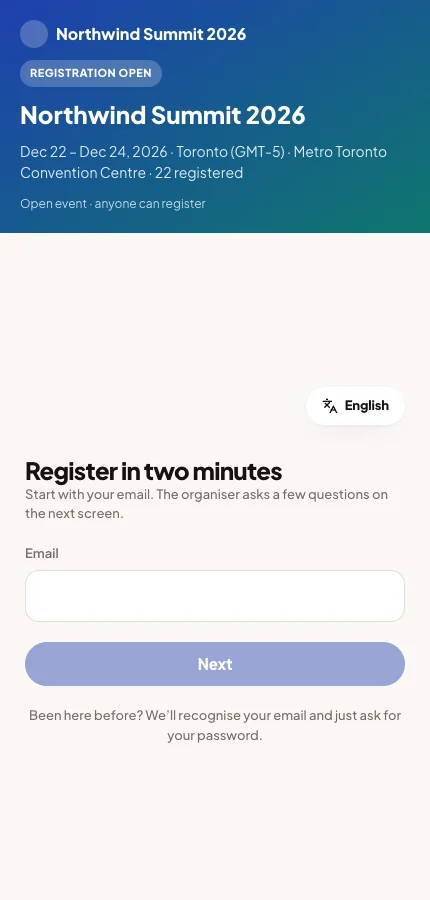
With White-label only, the event is not listed in the main Moostoo app, and links to the event open your app. With Both, both apps list it. The web address works the same either way.
Tips
- Start the developer accounts early. The stores' verification is usually the longest part.
- Choose the bundle ID and package name with care. After the first upload they are permanent.
- Apple lets you download the App Store Connect API key only once. Keep the
.p8file safe before you upload it here. - Changes you make after publishing go out with the next job. Changes to the app's screens reach installed apps without a store release.
- If a job fails, open its Log. The last lines, in the store's own words, say what to fix, for example a key without the App Manager role.