
Navigation: sections, Not added and the Mobile Menu
What attendees use is what they can find. The menu decides which pages exist in your app and how prominent each one is: a page in the phone's bottom bar is one tap away, a page under More is two, and a page in Not added does not exist for attendees at all. Arrange it around what your event is for — networking events lead with Attendees and Invitations, trade shows with Exhibitors and the venue map.
How it works
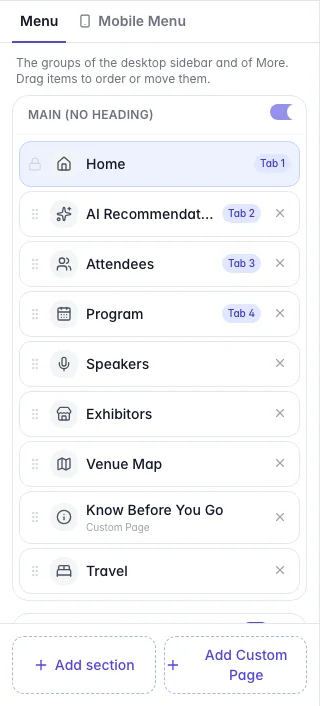
The left column of App → Designer has two tabs. Menu holds the sections of the app's menu and, below them, the pages that are Not added. Mobile Menu holds the tabs of the bottom bar attendees see on a phone.
Section A group in the menu, with an optional heading. New events start with three: the main section (no heading), Staff Tools and Me. You can rename, reorder, hide or delete sections and add your own — up to 12. On a computer each section is a group in the sidebar; on a phone they are the groups of the More menu.
Not added Pages that appear nowhere in the app. Removing a page from a section, or deleting its section, puts it here; use Add to to place it again.
Mobile Menu Up to four tabs on the phone's bottom bar, in the order you set. Everything else is under More, which opens the whole menu in its sections. With no tabs, attendees on a phone reach everything from More.
- Home is always first in the first section, which is always shown. Home cannot be removed; every other page can.
- A hidden section hides its pages, including any of them on the bottom bar.
- Staff pages are for staff only. The Entrance Scanner and Session Scanner are shown only to people who work the event — your organization's Account Owner and Super Users and the event team's admins, members and volunteers. Other attendees never see them, wherever you place them.
- Some pages wait for content. Speakers switches itself on once a session in your programme has a speaker, and Travel switches itself on once you add a hotel deal. My Badge starts in Not added — add it if attendees should open their badge from the menu.
- Contact organiser opens a message to your team from wherever you place it.
- The menu name is the screen name. Rename Program to Schedule and the screen's title changes with it.
Step by step
Arrange the menu
Open App → Designer and stay on the Menu tab.
Drag pages to reorder them or to move them between sections. The remove button on a page moves it to Not added.
Rename a section by typing in its heading; use the arrows to move it and its switch to show or hide it. Delete a section (the bin) to send its pages to Not added.
Click Add section at the bottom to add your own group — for example Sponsors or Workshops.
From Not added, use Add to to place a page into a section.
Choose the phone's bottom tabs
Open the Mobile Menu tab.
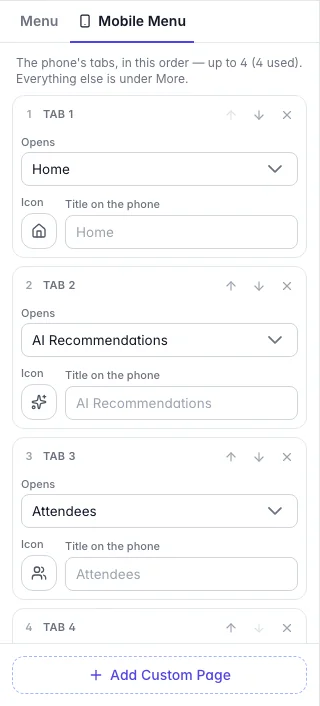
Use Add a tab to add a page, up to four. Only pages that are shown in a section can be tabs.
Reorder or remove tabs; the preview's phone view follows at once.
Click Save in the header.
What attendees see
In the attendee app
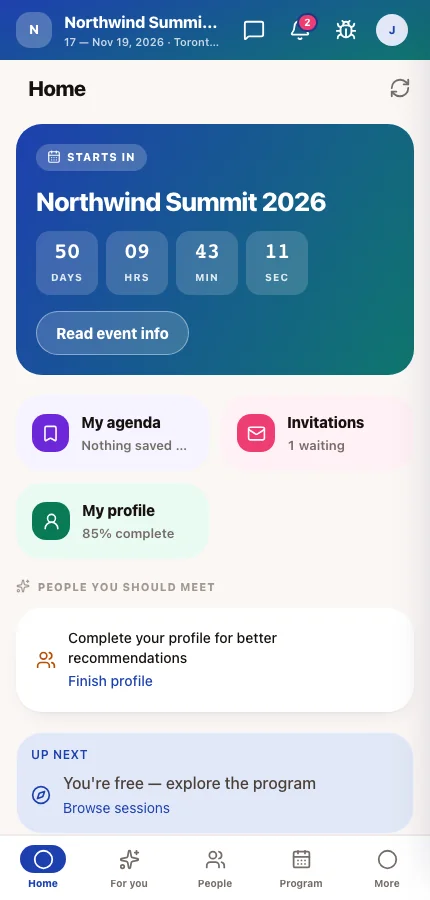
On a phone, attendees see your bottom tabs and a More tab that opens every section of the menu in order. Pages in Not added are not in their app at all.
In the attendee app
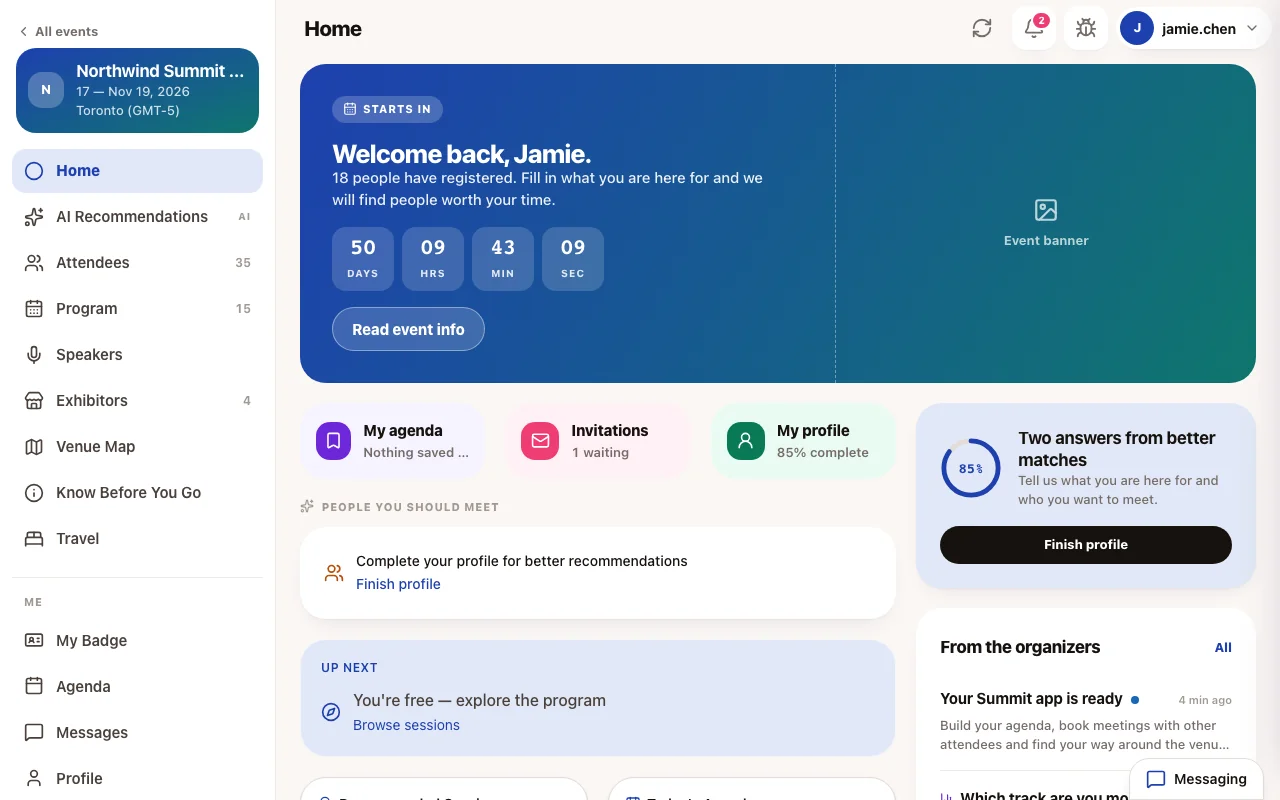
On a computer, the same sections become the groups of the sidebar.
Tips
- Give the bottom bar to what people do during the day — Home, Program, Agenda and Invitations or Exhibitors — and leave settings-style pages under More.
- You don't need to hide the Staff Tools section from attendees — only staff ever see the scanners in it.
- Take a page out rather than leaving it empty: an Exhibitors page at an event with no exhibitors is a dead end.