
Self-service kiosks
Kiosks take the queue away from the registration desk. An attendee walks up, identifies themselves, sees the badge about to print, and collects it — while your staff deal only with the exceptions. Setting a kiosk up properly decides where its badges print, how staff get into its settings at the door, and what attendees are greeted with.
How it works
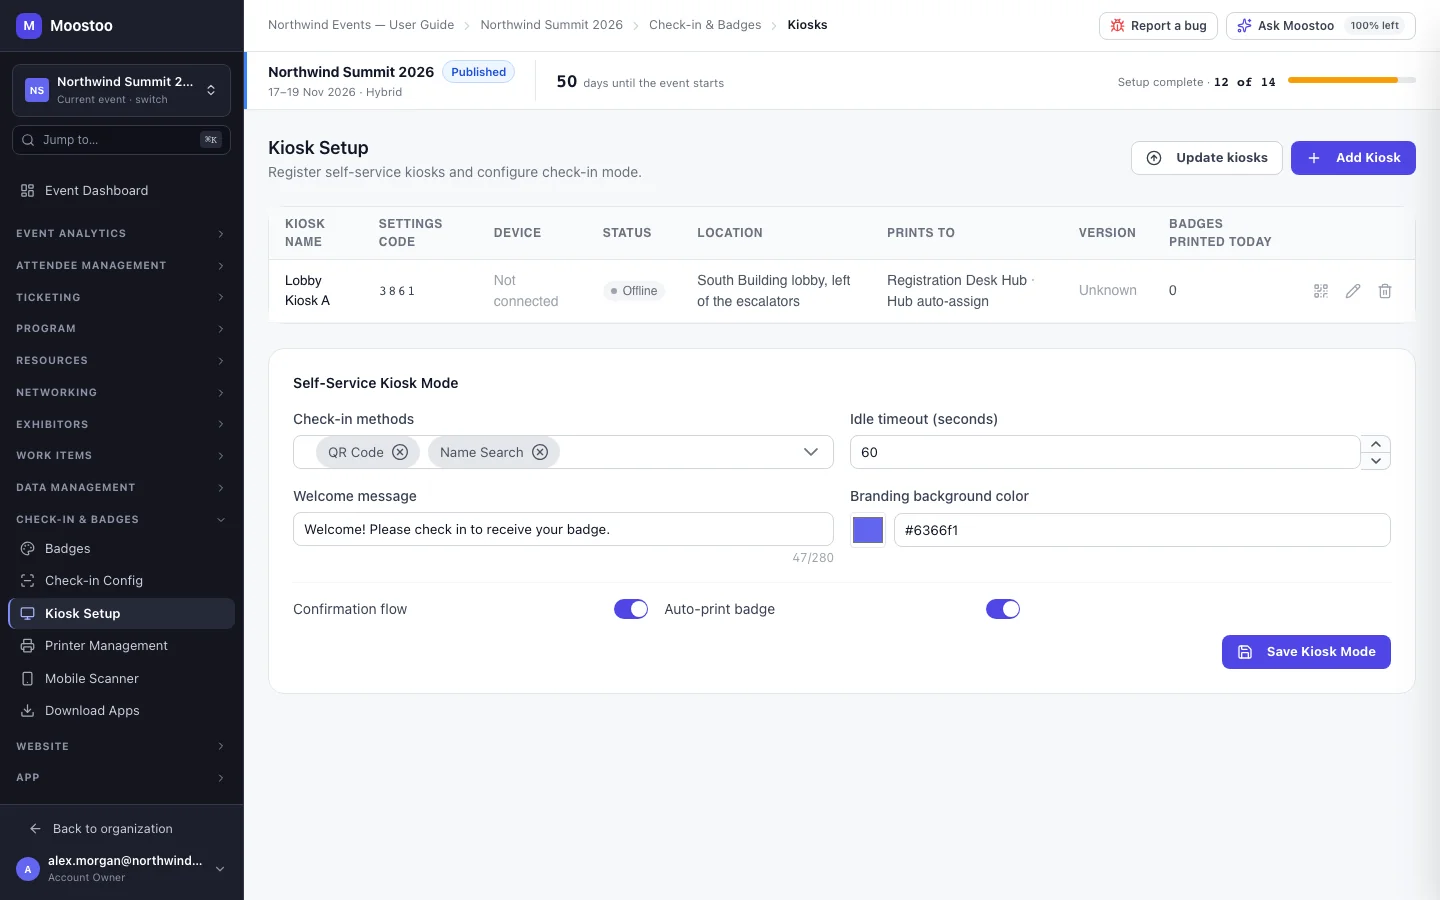
A kiosk is the Self-Service Kiosk app running full-screen on a laptop or a locked-down Android tablet (install it from Download apps). In Moostoo each kiosk is a record on Check-in & Badges → Kiosk Setup; a device becomes that kiosk when you connect it by scanning the QR code it shows. Kiosks never print by themselves: every badge is sent to a print hub. In a Ticketing & Check-in Console event this screen stays locked — Choose where your attendee data comes from first — until the event has an attendee data source.
Print hub Required. The hub this kiosk sends every badge to — only that hub receives them. A kiosk with no hub shows No print hub in the table and cannot print.
Printer Either a specific printer of that hub — every badge from this kiosk prints there, and no routing rule can send it elsewhere — or Hub auto-assign, where the hub decides using its routing rules and shares badges across the printers a rule names.
Staff settings code A 4-digit code generated for each kiosk and shown in the table's settings-code column. Staff type it on the kiosk to open its admin settings. There is no regenerate button — to change it, edit the kiosk and type a new one. It works even if the network is down, and a connected kiosk picks up a change within a minute.
Show the printer name after printing The kiosk's final screen names the printer the badge went to — useful when several printers stand at one door.
If the printer a kiosk names is deleted or moved to another hub, the kiosk does not break: it keeps its hub and falls back to Hub auto-assign. The Prints to column shows the hub and printer (or Hub auto-assign) for every kiosk.
Self-Service Kiosk Mode
Below the table, one set of settings applies to every kiosk of the event:
| Setting | What it does |
|---|---|
| Check-in methods | Which ways in the Welcome screen offers: QR Code (scan the badge or ticket QR) and Name Search (type at least two letters of a name, then tap your card). Registration ID is also listed, but the kiosk app does not yet offer a screen for it — choosing it alone leaves attendees no way in. |
| Idle timeout (seconds) | After this long with no touch, the kiosk returns to its Welcome screen, so the next person never sees the last one's details. Default 60. |
| Welcome message | The line under the event name on the Welcome screen. |
| Branding background color | The colour of the Welcome screen's wash. |
| Confirmation flow | On: the attendee sees the badge about to print and taps to confirm. Off: the kiosk checks them in as soon as they are identified. |
| Auto-print badge | On: the badge prints as soon as check-in succeeds. Off: the attendee taps to print. |
Step by step
Set up at least one print hub and its printers first on Printers and print hubs.
Open Check-in & Badges → Kiosk Setup and click Add Kiosk.
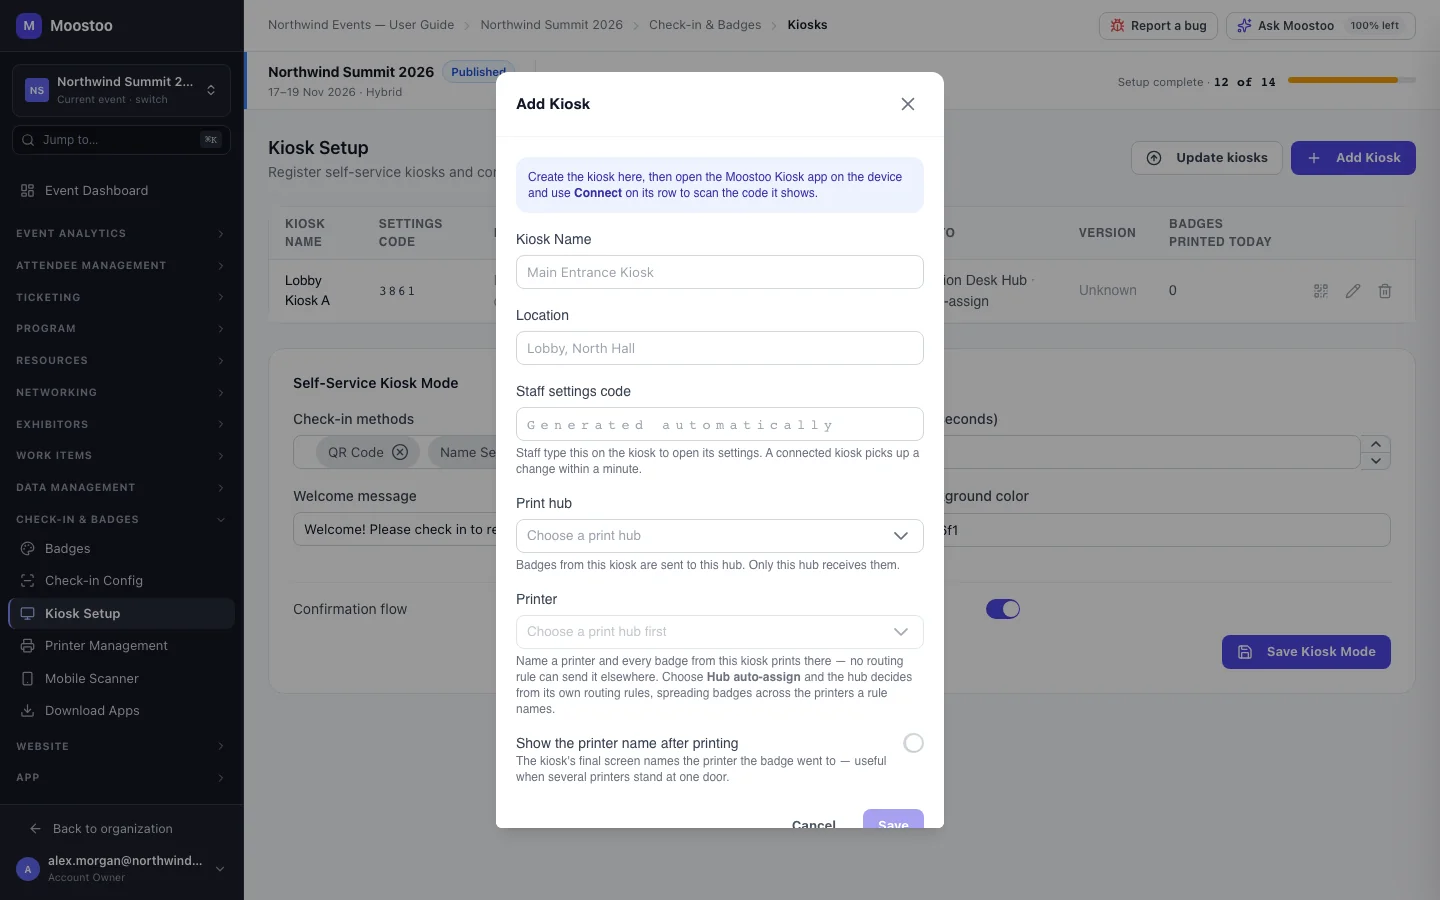
Enter a Kiosk Name (for example Main Entrance Kiosk) and a Location. Leave Staff settings code empty to have one generated.
Choose the Print hub, then either a Printer of that hub or Hub auto-assign.
Changing the hub clears the printer, because a printer belongs to one hub.
Turn on Show the printer name after printing if a door has more than one printer, then click Save.
Adjust Self-Service Kiosk Mode and click Save Kiosk Mode.
At the venue, install and open the kiosk app. It shows a QR code. Click Connect by QR on the kiosk's row and scan it, or type the code shown and click Connect.
The Device column turns to Connected. Nothing is typed into the tablet.
To change a kiosk later — its name, location, settings code, hub or printer — use Edit on its row; Delete removes the kiosk record.
Staff open a kiosk's admin settings by summoning the keypad — Ctrl+Shift+A on a laptop, a three-second press in a corner on a tablet, or five taps on the hidden corner of the Welcome screen — and typing the kiosk's settings code. After five wrong codes the keypad pauses for 15 seconds (Too many attempts — try again in …s).
What attendees see
At the kiosk
The attendee sees a branded Welcome screen with Scan QR Code and Search by Name, then a confirmation — Is this your badge? over a preview of the badge about to print (Is this you? while the preview loads) — a printing screen, and You're all set, <first name>! with "Pick up your badge at …", naming the printer's location, else the hub's, else the kiosk's, else the registration desk. With Show the printer name after printing on, it adds Printing at <printer>. Someone already checked in can print another badge. Every kiosk screen is laid out as one centred column.
In the attendee app
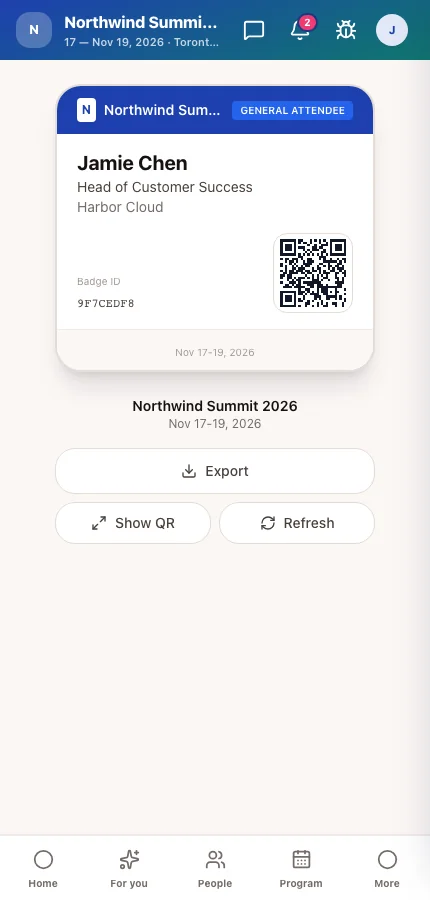
The QR code attendees scan at a kiosk is the one on their My Badge screen in the attendee app (or on the badge or ticket they were sent).
- Unpaid tickets are refused. An attendee whose order still owes money sees that payment is outstanding, with the order number and amount, and is sent to the registration desk — no check-in is recorded and no badge prints. There is no override at the kiosk; record the payment and the same badge then works.
- A badge that cannot print says why — no printer or hub assigned, the printer missing or not responding, no routing rule for this badge, a printer error, or Your badge is taking longer than expected. when the hub never reports back — and check-in is still recorded, so the attendee just collects the badge from staff.
- No network: the Welcome screen shows an Offline banner and waits.
Tips
- Put two printers behind a busy kiosk and set it to Hub auto-assign: one jam then slows the line instead of stopping it.
- Use a meaningful printer Physical Location (Desk 2, left) — it is exactly what the attendee is told to look for.
- Disconnect device returns a kiosk to its pairing QR (for example when a tablet is swapped); the kiosk record and its settings stay.
- Kiosks are copied when you clone an event, with a new settings code and no device connected.
- Keep kiosks up to date without visiting them — see Device updates.
Ask Moostoo
Create a kiosk called Main Entrance Kiosk in the North Hall lobby that prints through the Registration Desk Hub on Front Desk Left.
Add a kiosk called Side Door Kiosk on the Registration Desk Hub, and let the hub pick the printer.
Leaving out the printer sets the kiosk to Hub auto-assign.