
Custom pages
Every event has information that fits no standard screen: the dress code, shuttle times, the evening reception, how to find the quiet room. A custom page puts it in the app menu, where attendees already are, instead of in an email they will not find again on the day. Because custom pages are built from the website's sections, they can also show live event data — speakers, the schedule, sponsors — that stays current without you editing the page.
How it works
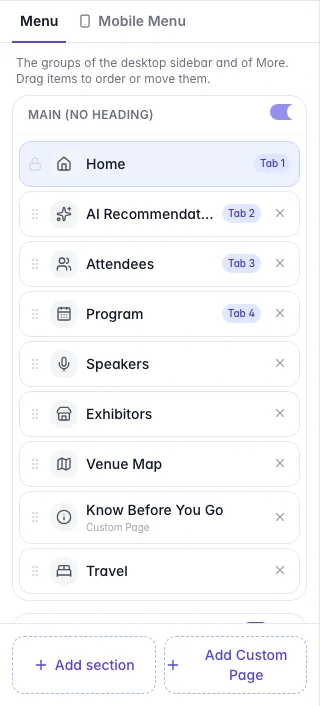
Custom pages are created in App → Designer and live in the app's menu like any other page: you can rename them, give them an icon, move them between sections, put them on the phone's bottom bar or leave them in Not added. Their content is built in a full-screen section editor.
Sections The same twenty sections as the website builder: Hero, Rich Text, Image, Image Gallery, Video, Logo Strip, Statistics, Highlights, Call to Action, FAQ, Countdown, Testimonials, Venue & Map, Speakers, Schedule, Sponsors, Exhibitors, Travel & Accommodation, Registration, and Custom HTML / Embed.
Live sections Speakers, Schedule, Sponsors, Exhibitors and Travel & Accommodation read your event's real records each time the page opens, so they never go stale.
Look A custom page is drawn in the attendee app's own colours and fonts — not your website's theme — so it feels like part of the app.
- Links out of the app go to your website. A button or speaker card that points at a website page works once that page is published; until then it falls back to its own address or the registration page.
- One Custom HTML / Embed section per page, run in a sealed frame. Use it for a vendor widget or a map embed; it is not held to the app's layout guarantees.
- Only people at your event can open a page — attendees and your event team. Anyone else, or a page you have deleted, gets a no longer available message.
Step by step
Open App → Designer and click Add Custom Page at the bottom of the menu.
Any unsaved changes in the Designer are saved first. The new page is added to the first section and selected.
In the right panel, give it a Label and an Icon, then click Edit Page Content.
Drag sections from Sections onto the page and fill each one in Options. Change the page's name and icon from the toolbar if you like.
Check it at Phone and Tablet widths, then click Save in the editor's toolbar and go back to the Designer.
Place the page where attendees will look for it — a section of the menu, or a bottom tab — and click Save in the Designer header.
To remove a page, select it and click Delete Page.
What attendees see
In the attendee app
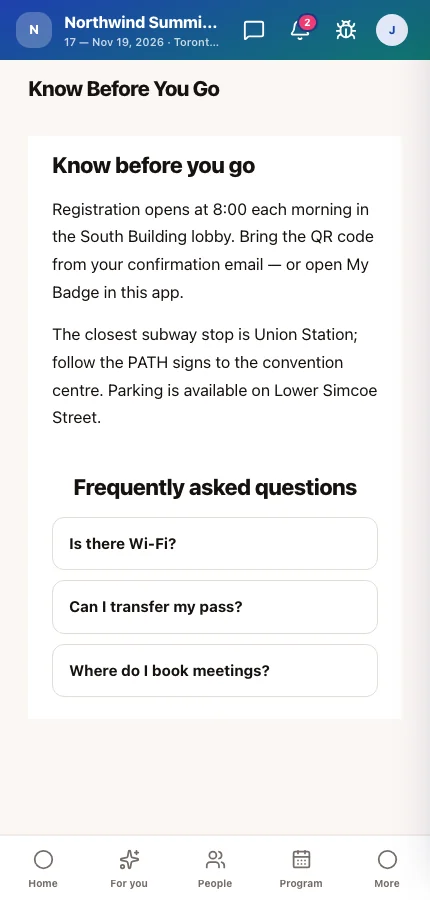
Attendees open the page from the menu and see it full screen in the app, with live sections showing today's speakers, sessions and sponsors.
Tips
- Use FAQ for practical questions — Wi-Fi, cloakroom, accessibility — and keep answers to a line or two for a phone screen.
- A Countdown and a Call to Action make a good Evening reception page in the days before the event.
- Prefer a live section over retyping: a Speakers section filtered to one track updates itself when a speaker changes.
- Deleting a page cannot be undone; take it out of the menu instead if you might need it again.