
The email editor
Emails are notoriously hard to get right: every inbox draws them differently and a layout that looks fine on a laptop can collapse on a phone. The email editor lets you build an email from sections that are known to survive real inboxes, personalise every piece of text with the recipient's details, and see exactly what a recipient will read — with their name filled in — before you send. Automated emails and campaigns use this same editor, so you only learn it once.
How it works
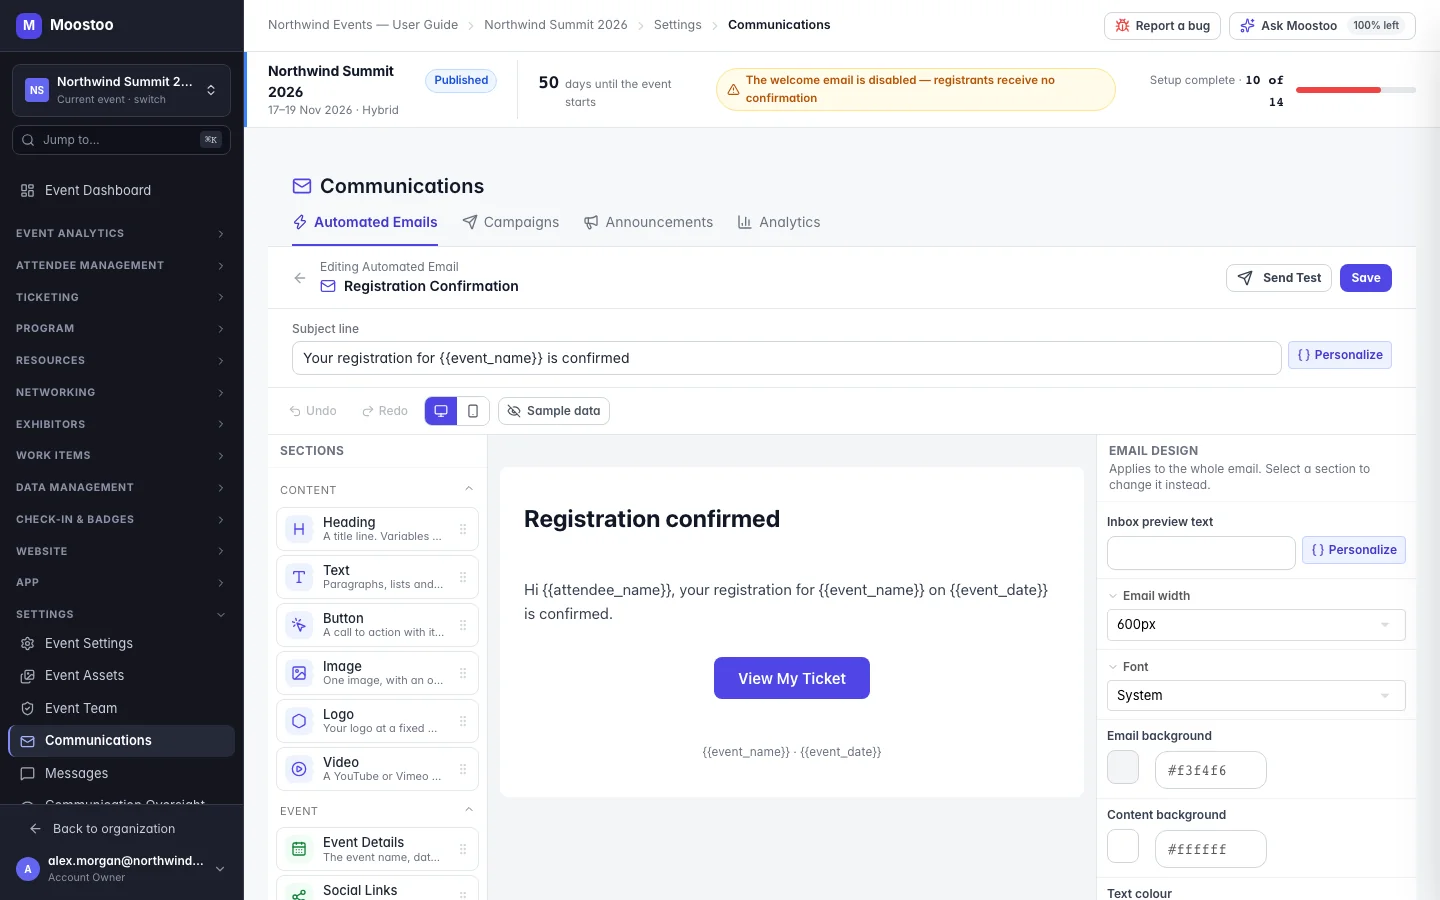
The editor has three panels. On the left, Sections — the building blocks you can add. In the middle, a live preview of the email drawn exactly as it will be mailed. On the right, Options: the settings of the section you selected, or — when nothing is selected — the Email design that applies to the whole email (background, content width, fonts, colours and the inbox preview text).
| Group | Sections |
|---|---|
| Content | Heading, Text (paragraphs, lists and links), Button, Image, Logo, Video (a thumbnail that opens the video) |
| Event | Event Details (name, date and a link, filled in per event), Social Links, Footer |
| Layout | Columns (two or three, each holding its own sections), Divider, Spacer, Custom HTML |
Variable A placeholder such as {{attendee_first_name}} or {{event_name}} that is replaced by each recipient's own value when the email is sent. In the Text section a variable appears as a chip; everywhere else it is written in double braces.
Personalize The button beside every text field that lists the variables this email can fill. Typing {{ offers the same list as you type.
Sample data A toolbar switch that shows every variable as a realistic sample value, so you read the email the way a recipient will.
Not available here A toolbar warning naming any variable this particular email cannot fill — for example a meeting time in a registration email. Such a variable would be sent empty.
- Variables work in every attendee-facing text: the subject line, headings, paragraphs, button labels and links, image descriptions and links, event details and the footer — and in a campaign, custom questions from your Question Pool.
- Colours are per section and per email. Unlike the website, an email section may carry its own background and button colours, because an email has no site-wide theme.
- Columns stack on a phone. Two or three columns side by side on a desktop become one column on a phone automatically; columns cannot be nested inside columns.
- Images come from the Media Library as PNG, JPG or GIF, or from an address you paste.
- What you see is what is sent. The HTML that reaches inboxes is produced by Moostoo from your design when you save; a design that cannot be sent is refused on save with the reason, and nothing is stored.
Custom HTML
The Custom HTML section is sent as you write it. Moostoo does not check it and cannot guarantee how each inbox draws it. Use it for a snippet you trust, not to build the email.
Step by step
Open an email: Edit on an automated email, or the Design step of a campaign.
Drag a section from Sections onto the preview, or click it to add it at the end. Use the controls on each section to move, duplicate or delete it.
Select a section and change its content and look under Options. Click an empty part of the preview to return to Email design.
Insert variables with Personalize or by typing {{, then turn on Sample data to read the result.
Use the width switch to check the email at Desktop and Phone width. Undo and Redo are in the toolbar.
Clear any Not available here warning, click Send Test to see it in a real inbox, then Save.
What attendees see
In attendee emails
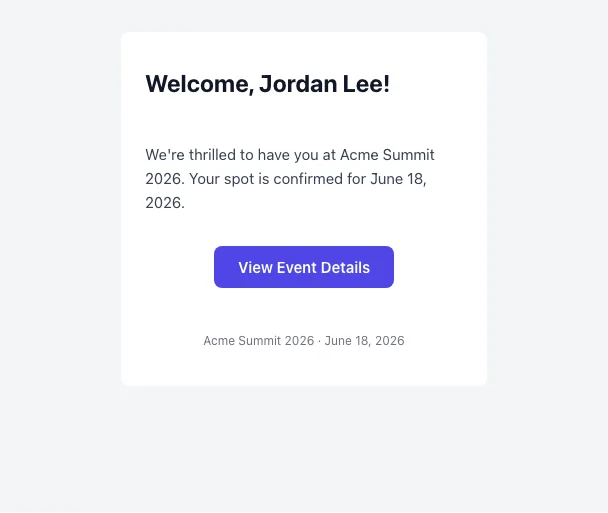
Recipients receive a clean, table-based email that most inboxes display consistently, with every variable replaced by their own details and columns stacked on a phone. A variable with no value for that person is left empty rather than printed as a placeholder.
Tips
- Fill in the inbox preview text in Email design — it is the line most inboxes show next to the subject, and it decides whether an email is opened.
- Always write the image description of an image; many inboxes block images until the reader allows them.
- Prefer a Button to a link inside text for your main call to action — it is easier to tap on a phone.
- On a narrow screen the editor switches to a compact layout with the catalog, outline and options behind a bottom bar; the email itself is unchanged.