
Check-in setup
Doors are where an event is won or lost. A few decisions made in advance — can someone who stepped out come back in, which printer a scanner uses, whether a badge prints the moment a ticket is scanned — decide how fast your queue moves and how many arguments your door staff have to settle. Set them once, before the first attendee arrives, and every scanner your team opens follows them.
How it works
Check-in settings live on two screens under Check-in & Badges in the event sidebar. Check-in Config holds the rules of entry — who may come back in and when check-in is open. Mobile Scanner holds how the staff scanners behave — which printer they print to, whether they print automatically, sounds and photos. Both are saved per event and read by every scanner the next time it loads. In a Ticketing & Check-in Console event these screens stay locked — Choose where your attendee data comes from first — until the event has an attendee data source.
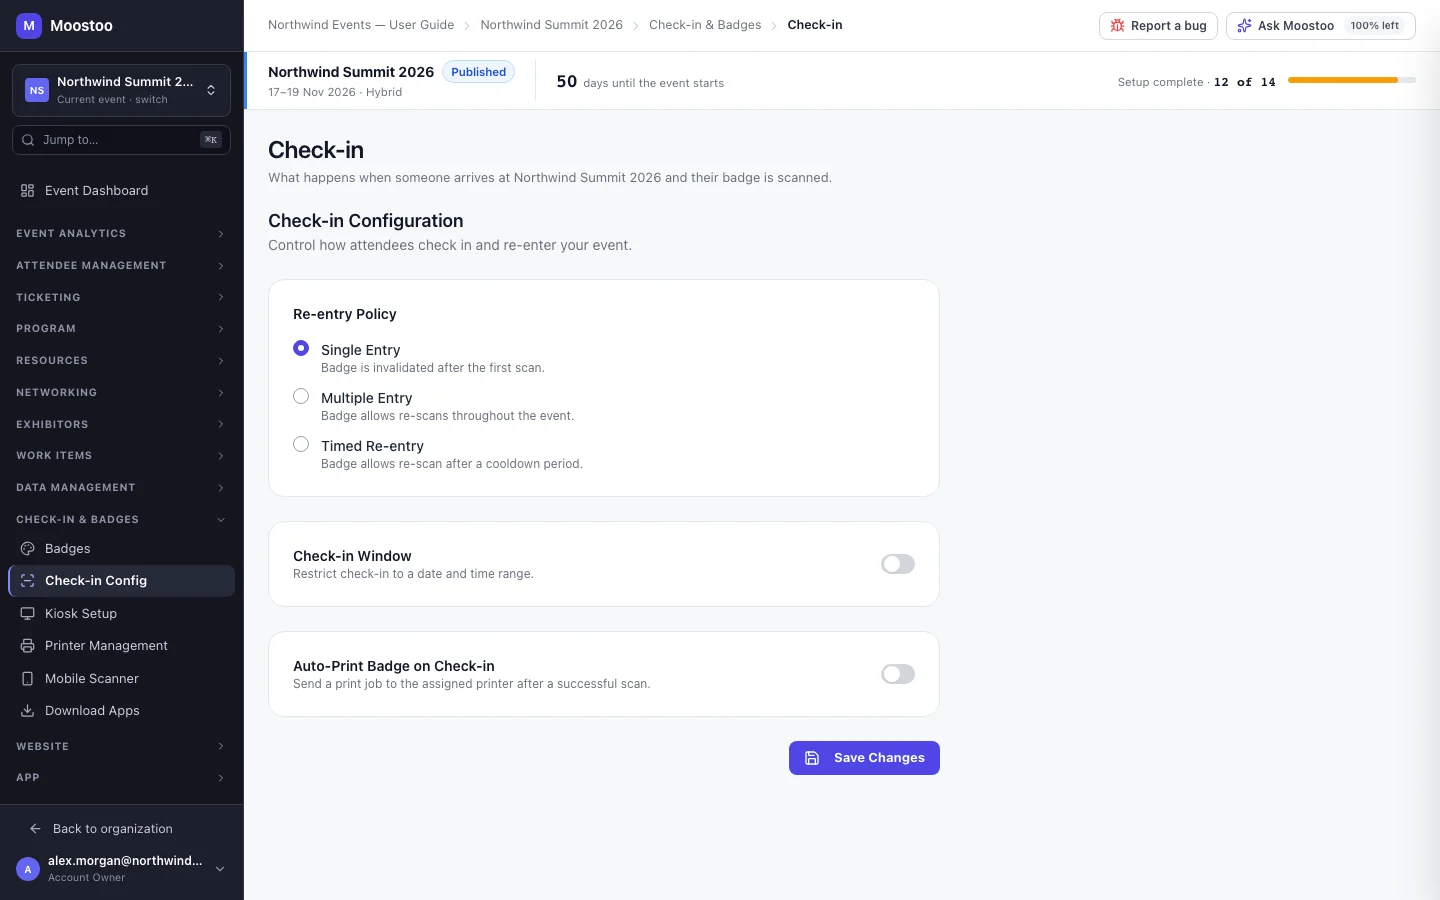
Single Entry The default. A badge checks in once. A second scan shows Already checked in with the time and the staff member who scanned it, and the scanner offers no way to check it in again.
Multiple Entry A badge can be scanned back in at any time. Use it for events where people come and go all day.
Timed Re-entry A badge can be scanned back in only after a cooldown you set in minutes. It stops one badge being passed back over the barrier to a friend, while still letting a real attendee return from lunch.
Check-in Window An opening and closing time for check-in, each picked as an event day plus a time. The times are typed and shown on the event's own timezone — 08:00 means 08:00 at the venue, wherever you are when you set it.
Badge code What every scanner reads: the attendee's own QR code if you set one, otherwise their ticket ID, otherwise Moostoo's internal attendee ID. See Badge codes.
Changing the event's timezone later keeps the window's reading: a window that opened at 08:00 still opens at 08:00 on the corrected zone, the same day. See Timezone.
| Setting | What it does |
|---|---|
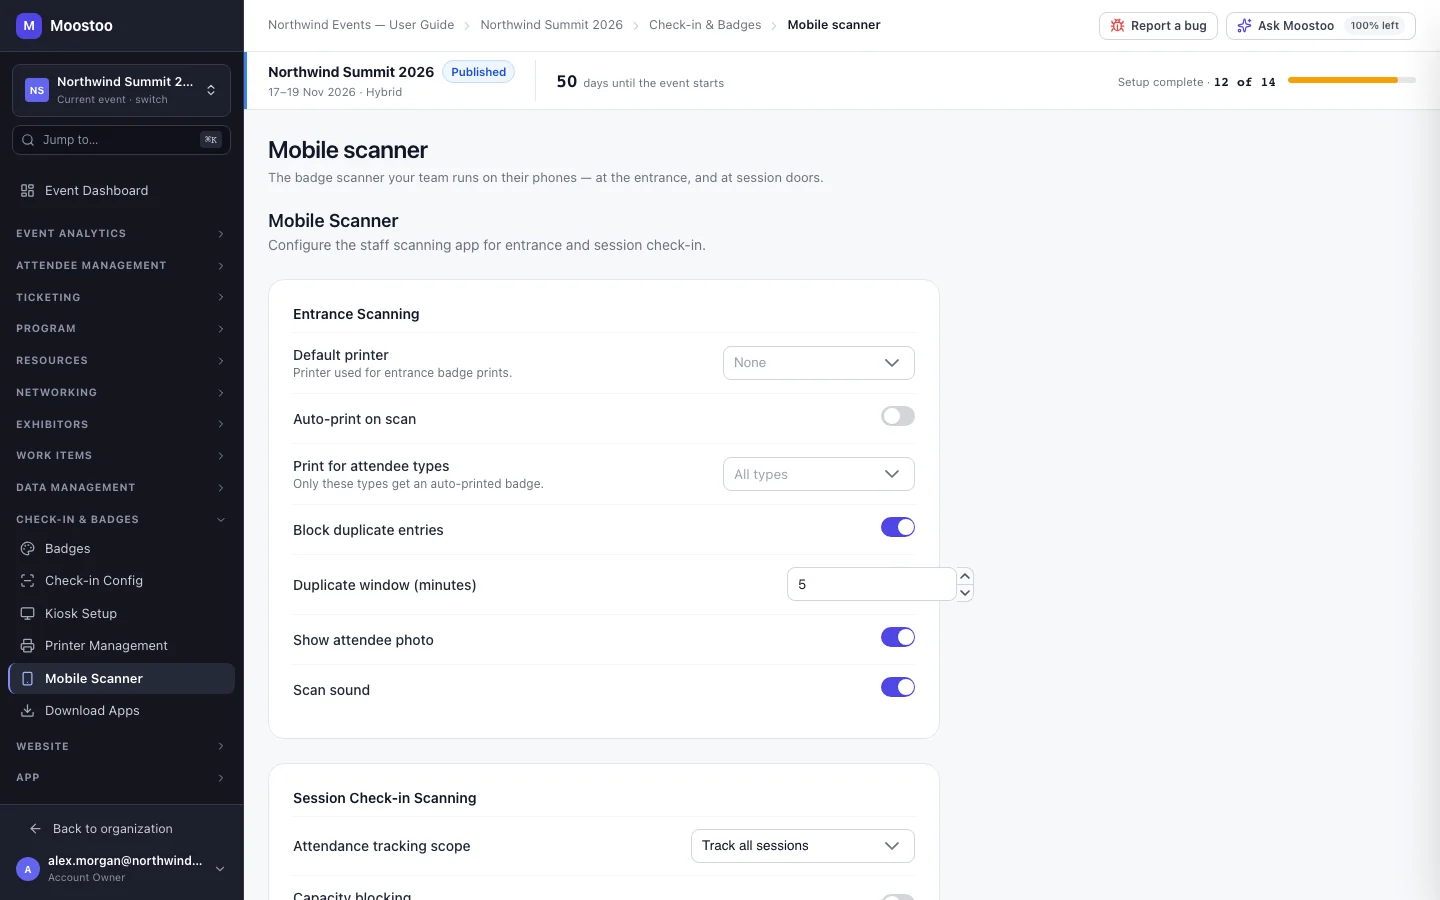
| Default printer | The printer the entrance scanner starts on. Staff can switch printer on the scanner itself; offline printers are marked. |
| Auto-print on scan | Prints the badge as soon as a scan checks someone in, without staff tapping Print Badge. Only prints when the selected printer is online. |
| Print for attendee types | Which attendee types should get an automatic badge. |
| Block duplicate entries / Duplicate window | A time window inside which a second scan of the same badge is treated as a duplicate. |
| Show attendee photo | Shows the attendee's profile photo on the scan result, so staff can check the badge belongs to the person holding it. |
| Scan sound | A confirmation or error sound on each scan — useful on a noisy show floor. |
| Session Check-in Scanning | Attendance tracking scope, capacity blocking, manual entry fallback and sound for the session scanner. Hidden in the Ticketing & Check-in Console, which has no programme. |
What the scanners enforce today
The re-entry policy, default printer, auto-print on scan, photo and sound are applied by the scanners. The Check-in Window, the Auto-Print Badge on Check-in switch on Check-in Config, Print for attendee types, Block duplicate entries and the four session-scanning settings are saved but not yet applied when a badge is scanned — do not rely on them to stop an early or duplicate check-in. Brief your door staff instead.
Step by step
Set the rules of entry
Open Check-in & Badges → Check-in Config.
Under Re-entry Policy, choose Single Entry, Multiple Entry or Timed Re-entry.
For Timed Re-entry, enter the Cooldown (minutes) a badge must wait before it can be scanned back in.
If you want a check-in window, turn on Check-in Window and pick the day and time it Opens and Closes.
Only the event's days are offered. A window saved on a day the event no longer covers keeps that day and is marked, rather than being silently reset.
Click Save Changes.
Set up the staff scanners
Open Check-in & Badges → Mobile Scanner.
Under Entrance Scanning, choose the Default printer and turn Auto-print on scan on if every attendee should leave the door with a printed badge.
Printers are added on Printers and print hubs; an empty list here means none has been added yet.
Turn on Show attendee photo and Scan sound if they help your door.
Review Session Check-in Scanning if you track attendance at session doors.
Click Save Changes. Scanners pick the settings up the next time they open.
What attendees see
Attendees never see these settings, but they feel them at the door: whether they can step out and come back, and whether a badge is handed to them the moment they are scanned.
In the attendee app
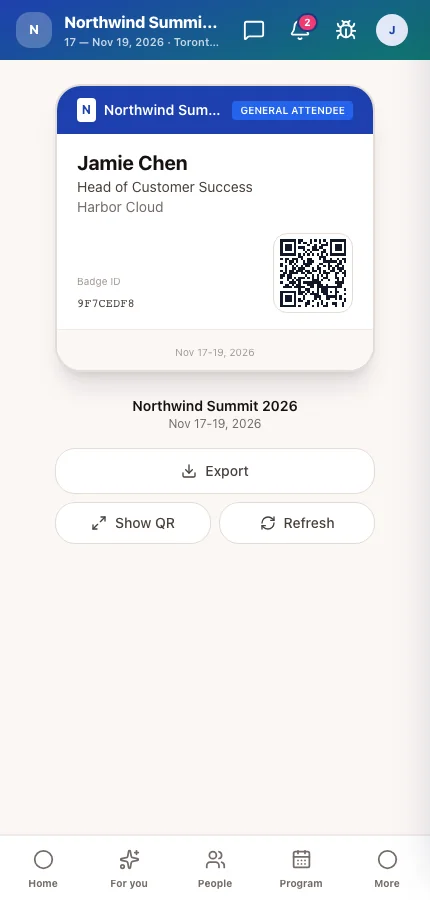
Before they arrive, an attendee's My Badge screen tells them to visit the registration desk. Once they are checked in — or their badge is printed or sent to their phone — the same screen shows their badge with its scannable code.
Tips
- Start with Single Entry for ticketed events and switch to Timed Re-entry only if staff keep being asked to let people back in.
- Pick the default printer that sits next to the entrance scanner. A badge printing on the other side of the hall is a badge somebody else picks up.
- Turning on Auto-print on scan needs a printer that is online. If none is, the scan still checks the attendee in and nothing prints — check Printers and print hubs before doors open.
- Who may use the scanners is decided by your event team, not by these settings — see Entrance check-in.
Ask Moostoo
Before doors open, Ask Moostoo can tell you how many people to expect.
How many people are registered for Northwind Summit 2026, by attendee type?