
Add a ticketing system
Every attendee list starts somewhere. If you sell tickets with Moostoo, the purchase, the payment, the ticket and the attendee are one chain you control end to end. If you already sell elsewhere, connecting that platform brings the people in without asking them to register twice — and keeps them in step as sales continue. This choice decides which ticketing screens you work with from then on.
How it works
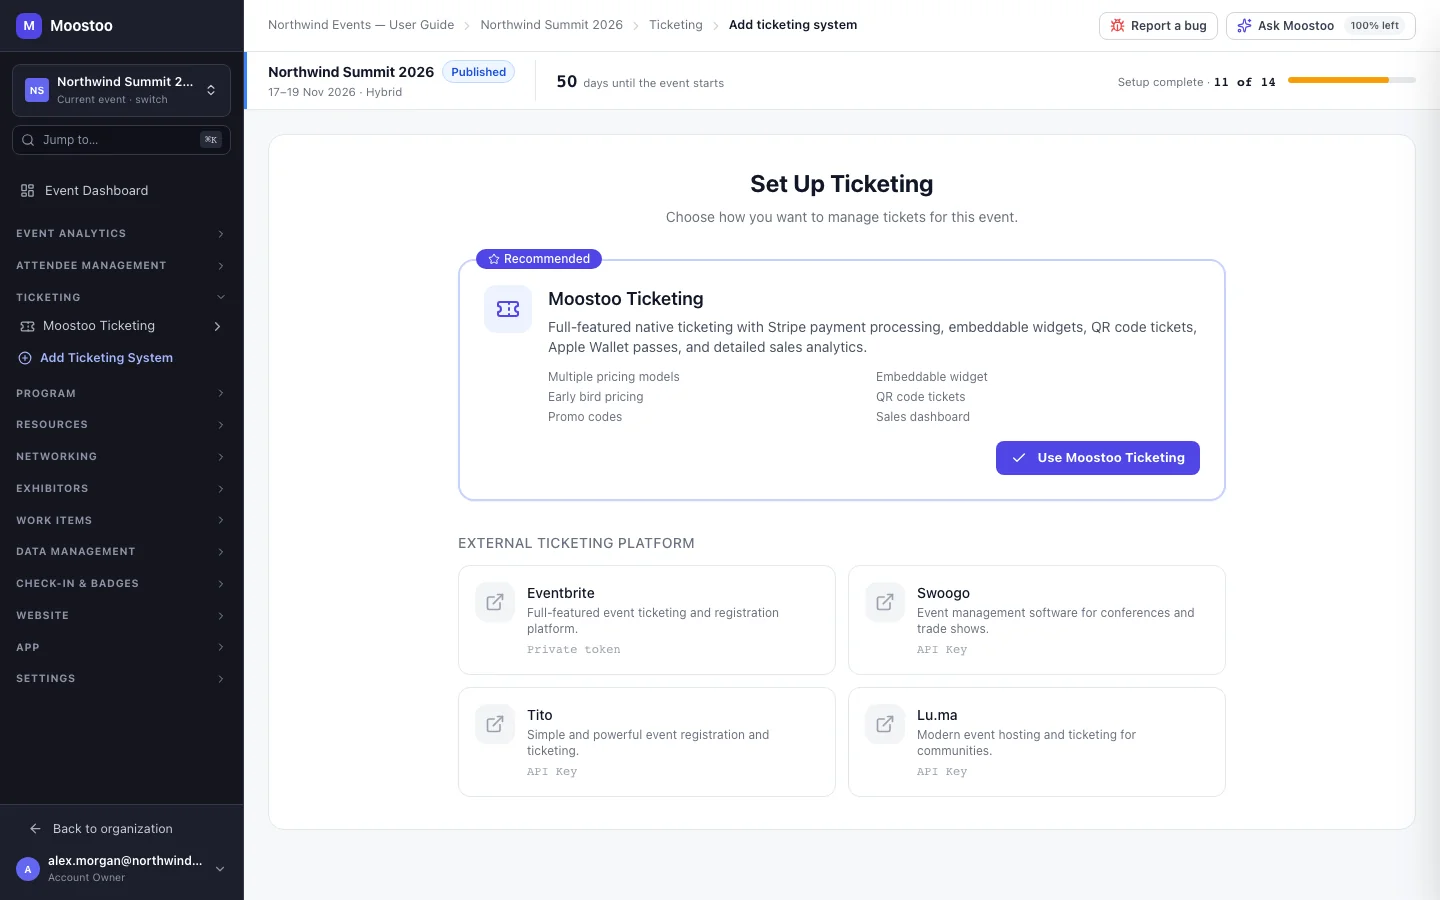
A ticketing system is one source of tickets for one event. Until you set one up, the sidebar's Ticketing group holds a single Tickets item that opens this setup screen. Once a system is set up, it gets its own entry in the Ticketing group, named after the source, and an Add Ticketing System link lets you add another.
| Aspect | Moostoo Ticketing | External platform |
|---|---|---|
| What it is | Moostoo sells the tickets: ticket types, prices, promo codes, orders, card payment through Stripe, invoices | Your tickets are sold on Eventbrite, Swoogo, Tito or Lu.ma; Moostoo reads the registrations |
| Its screens | Ticket Types, Orders, Tickets, Promo Codes, Dashboard, Embed Widget, Import Attendees, Settings | Overview, Mapping, Import History, Settings |
| Scans at the door | A QR code per ticket, issued by Moostoo | The provider's own identifier or barcode — see Badge codes |
| Writes to the provider | — | Never. The connection is read-only |
- You can add more than one. An event can sell some passes with Moostoo and import others from a partner's Eventbrite, or connect two platforms.
- A system only appears in the menu once it is set up. Moostoo Ticketing is ready the moment you choose it. An external platform counts as set up once it is connected, its external event is chosen and at least one of its registration types is mapped to an attendee type — before that it would import nobody. Choosing a provider and closing the wizard halfway does not leave a dead menu entry; choosing the same provider again resumes the same connection rather than creating a second one.
- Test mode applies to Moostoo Ticketing: while it is on, a banner across every ticketing screen says so. See Invoices & settings.
Step by step
In the event sidebar, open Ticketing → Tickets (or Add Ticketing System if the event already has one).
To sell with Moostoo, click Use Moostoo Ticketing.
You land on its Ticket Types screen. Continue with Ticket types.
To connect a platform, click its card under External Ticketing Platform.
The import wizard opens over this screen: connect, choose the external event, map, review and import. See Connecting a ticketing platform.
Rename a system any time under its Settings → Instance Name; the name is what the sidebar shows.
What attendees see
Attendees never see this screen. What they experience follows from your choice: with Moostoo Ticketing they buy and register through Moostoo; with an external platform they buy where they always have, and appear in Moostoo once imported.
Tips
- Deleting a ticketing system (Settings → Danger Zone, type delete to confirm) removes it from the sidebar together with its provider connection, mappings and import history, and cannot be undone. Attendees already imported stay on your attendee list. Disconnecting an external platform is the gentler option: it removes only the credential and live sync, and keeps the mappings and history for a later Reconnect.
- In the Ticketing & Check-in Console edition this same screen asks Where does your attendee data come from? and must be answered before badges and check-in open — see Attendee data source.